Home
» Crafts
»
The Easiest Way to Transfer a Simple Pattern Onto Fabric
The Easiest Way to Transfer a Simple Pattern Onto Fabric
If you have a simple line drawing, monogram, embroidery motif, or sewing mark to put onto fabric, the easiest method is usually direct tracing with a removable fabric marker. Place the printed pattern under a light-colored fabric, make the lines visible with a bright window or light box, and trace only the lines you actually need. It is inexpensive, fast, and requires very little setup.
This approach works best when the fabric is light enough and thin enough for the pattern to show through. It is especially practical for cotton, linen, muslin, and similar woven fabrics used for hand embroidery or small craft projects. A water-soluble embroidery transfer pen is designed for this kind of job: DMC, for example, describes its transfer pen as suitable for tracing designs onto light- and medium-colored fabric, with marks removable using a damp cloth or cold water. See the manufacturer's embroidery transfer pen guidance.
What should you decide before you start?
First, look at the fabric rather than the pattern. The transfer method should match the fabric's color, thickness, texture, and whether it can safely get wet.
Light, fairly smooth fabric: direct tracing is usually the simplest choice.
Dark or opaque fabric: use colored transfer paper or another method that places a visible mark on top of the fabric.
Fuzzy, heavily textured, or difficult-to-see fabric: a water-soluble printable or traceable stabilizer can be easier because the design sits on the surface.
Fabric that should not be washed: avoid assuming that a water-soluble marker or stabilizer is appropriate; choose a removable method recommended for that fabric and test it first.
Also decide whether the lines will be hidden by stitching or must disappear completely afterward. Even products marketed as removable should be tested on a scrap or an inconspicuous area before you mark the final piece.
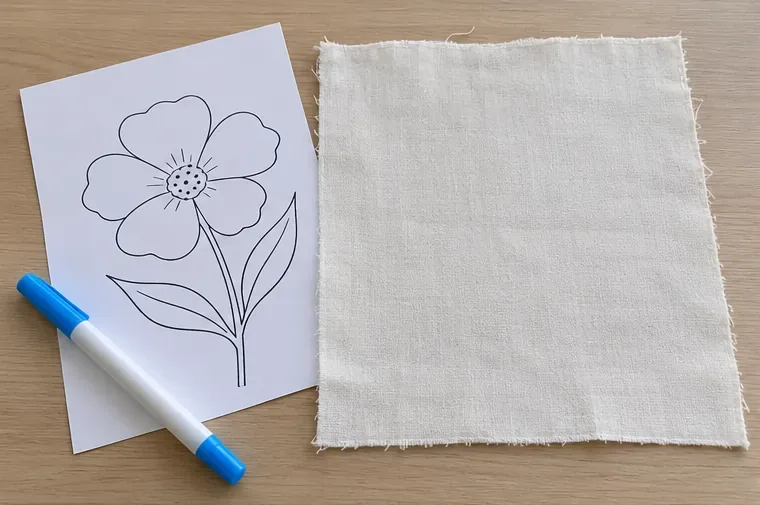
Start with a simple printed pattern, a light-colored fabric, and a removable fabric marker that is appropriate for the fabric.
What is the easiest transfer method for a simple pattern?
For a small, uncomplicated design on light fabric, use the pattern-under-fabric tracing method. You do not need carbon paper, an iron, a printer-compatible stabilizer, or special transfer equipment. A window on a bright day can serve as your light source; a light box simply makes the setup more comfortable.
1. Prepare the fabric and pattern
Press the fabric if it is wrinkled, because folds can shift the outline and make a simple shape look uneven. Print or draw the pattern at the final size you want. If the design has text, directional lettering, or an asymmetrical element, keep its orientation in mind before tracing. Direct tracing does not reverse the design, so what you see on the paper is what you transfer.
Place the paper pattern on a flat surface and position the fabric over it. If the fabric or paper moves easily, secure the edges with low-tack tape outside the area you will stitch.
2. Make sure the pattern is clearly visible
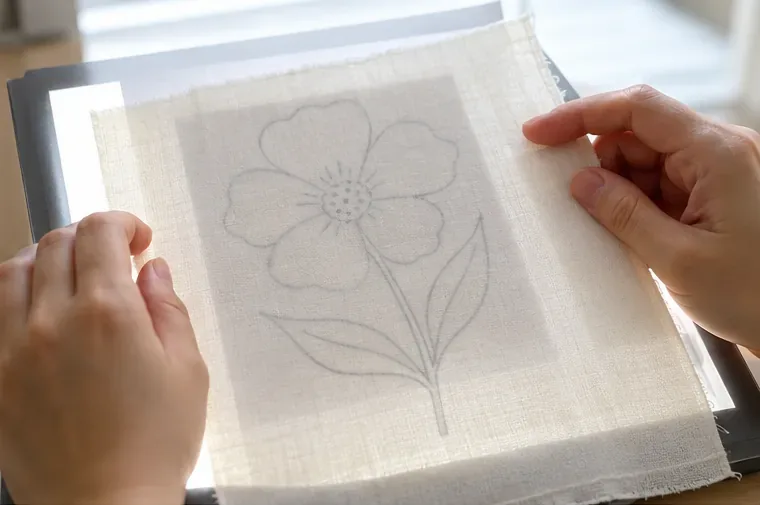
Hold the layered paper and fabric against a bright window, or place them on a light box. The goal is not maximum brightness; it is enough contrast to see the lines without straining. Reposition the fabric until the motif is centered and straight.
A light box or bright window lets the printed outline show through light woven fabric so it can be traced accurately.
3. Trace lightly with a removable fabric marker
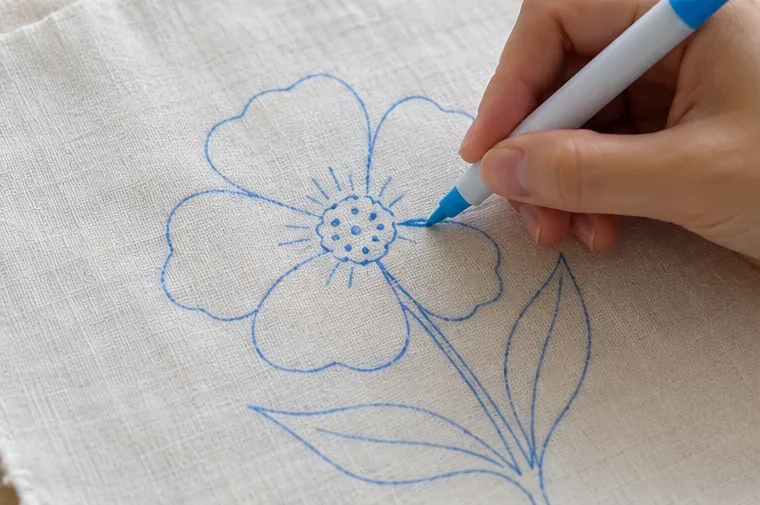
Trace the main contours with a light hand. You do not need to redraw every tiny printed detail if your stitching plan does not require it. Short, controlled strokes are usually easier than pressing hard and trying to draw an entire curve in one motion.
Use a marker intended for fabric, and follow its removal instructions. DMC states that its blue transfer pen uses non-permanent, water-soluble ink and can be removed with a damp cloth or cold water. Product formulas differ, so do not assume every marker behaves the same way.
Trace only the lines you need, using gentle pressure so the transferred design stays clear without becoming unnecessarily heavy.
4. Check the transfer before removing the pattern
Before separating the layers, scan the entire design. Look for missed corners, broken curves, misplaced center marks, or sections that are too faint to follow. Correcting a missing line now is easier than trying to realign the original pattern later.
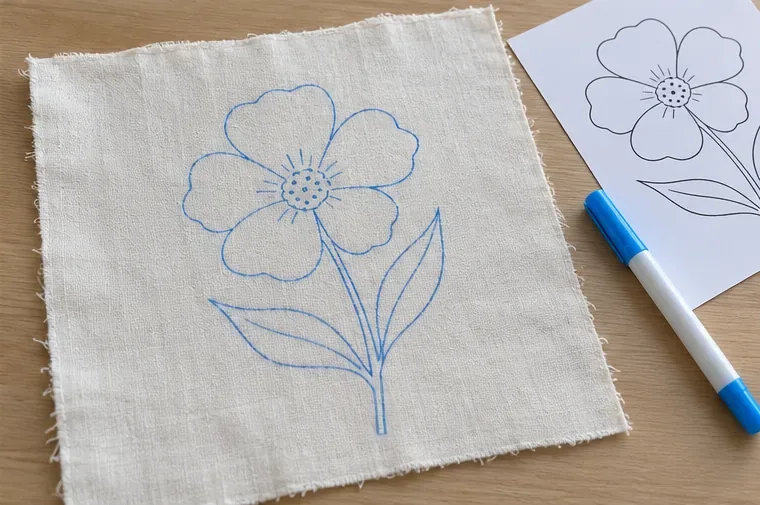
Once the outline is complete, remove the fabric from the light source and inspect it under normal room lighting. If it will be embroidered, you can then hoop or stabilize the fabric as your project requires.
The finished transfer should be easy to see in ordinary light and should match the printed pattern before stitching begins.
When is tracing not the best option?
Direct tracing is easy because it relies on seeing the pattern through the fabric. When that is not possible, switch methods instead of forcing it.
For dark or opaque fabric, chalk-based transfer paper is a practical alternative. Clover's Chacopy paper is made specifically to transfer paper patterns to fabric. The manufacturer instructs users to place the chalk side against the fabric, put the pattern on top, and trace with a stylus or tracing wheel. It is available in contrasting colors for different fabrics. Clover also warns that heat can make chalk marks harder to remove, so it recommends testing first and avoiding ironing over the marks. See Clover's Chacopy tracing paper instructions.
For fabric with a surface that hides traced lines, or for a design with many fine details, a water-soluble stabilizer can reduce frustration. Sulky's Sticky Fabri-Solvy, for example, can carry a traced or printed design on a fabric-like sheet that adheres to the project and is later removed with water. Sulky's own project instructions describe tracing a design onto the stabilizer, smoothing it onto the fabric, stitching through it, and then rinsing it away. See the manufacturer's Sticky Fabri-Solvy project guidance.
Which method is easiest for your fabric?
Fabric or project
Best simple starting method
Why
Light cotton or linen
Trace through the fabric with a removable marker
Few tools, fast setup, easy to align
Dark or opaque woven fabric
Colored fabric transfer paper
Creates a contrasting line without needing to see through the fabric
Textured or fuzzy surface
Water-soluble stabilizer
Puts the design on a smooth surface above the fabric
Very detailed motif
Stabilizer or carefully traced transfer paper
Fine details can be easier to preserve
Non-washable or uncertain fabric
Test a removable marking method first
Removal method matters as much as visibility
What mistakes cause the most trouble?
Skipping the scrap test. A marker can behave differently on different fibers, finishes, and dyes. Test both the marking and the removal method before working on the final piece.
Pressing too hard. Heavy lines are not automatically better. They can be harder to cover with fine embroidery and may require more effort to remove.
Using heat before marks are removed. This is particularly important with chalk-style transfer products. Clover specifically cautions that ironing may make chalk marks difficult to remove.
Letting the paper or fabric shift. If the pattern moves halfway through tracing, circles become ovals and repeated shapes stop lining up. Secure the layers before you begin.
Choosing a method because it is popular rather than because it fits the fabric. A window-tracing method that is effortless on white cotton can be nearly useless on navy canvas. The easiest method is the one that creates a visible, removable line with the least handling of the fabric.
How can you tell whether the transfer is good enough?
A successful transfer does not need to be artistically perfect. It needs to do three things: show the placement clearly, preserve the important shapes, and remain removable according to the marker or transfer product instructions.
Before stitching, look at the fabric from arm's length. Confirm that the design is centered, the major curves flow smoothly, and small reference points are visible. Then compare it once more with the original paper pattern. If those checks pass, stop refining. Repeatedly drawing over the same line can make a simple transfer messier rather than more accurate.
Bottom line
If your pattern is simple and your fabric is light enough to see through, the easiest approach is to put the pattern underneath, use a bright window or light box, and trace it with a removable fabric marker. It is quick, low-cost, and easy to correct before stitching. For dark fabric, switch to contrasting transfer paper; for textured surfaces or intricate designs, a water-soluble stabilizer can be more reliable. Whatever method you choose, test the marking and removal process on scrap fabric first.