Making slime is an easy, inexpensive way to keep your kids busy. Little ones can help add the ingredients and they love to see the fruits of their labor come to life in this malleable activity. There are many great ways you can make slime with a few simple, affordable ingredients.

Cornstarch is a key element in many slime recipes. The natural properties of this polymer, a long chain of atoms, make it a natural way to have some fun.
How to make slime with cornstarch and water
If you have kids with sensitive skin or other allergies, you may want to consider the most simple of all slime recipes. Using only cornstarch and water, this recipe has mild ingredients that won’t cause irritation to the skin and is easy to make.
Gather your supplies. Necessary items for this recipe include:
- Cornstarch
- Water
- Large mixing bowl
- Glitter
Perform these steps for an easy-peasy slime mixture.
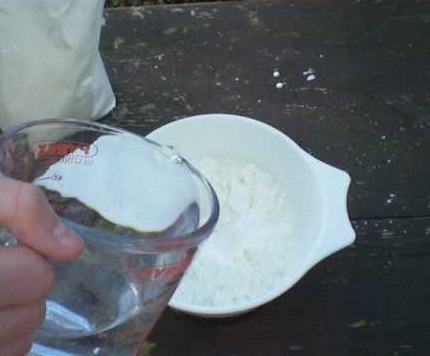
Put cornstarch into mixing bowl.
Begin adding water slowly.
Optional: Mix in glitter for a colorful craft.
Mix with hands until the mixture is smooth.
Continue adding water until you have achieved your desired consistency.
Store in a plastic bag or airtight container.
This one can also be made without the glitter for a bare bones type of fun activity.
How to make slime with cornstarch and dish soap
You can also make slime using cornstarch and everyday dish soap or body wash. You just need a few ingredients:
- Cornstarch
- Dish soap or body wash
- Mixing bowl
- Mixing utensil
- Glitter
Follow these steps to make this do-it-yourself cornstarch slime:
Add cornstarch to mixing bowl.The amount will vary depending on how much you want to make. If you are unsure of how much you need, start small and add more as you go along. Begin with about two tablespoons.
Add dish soap or body wash to bowl.If you started with two tablespoons of cornstarch, add about 1.5 tablespoons of dish soap or body wash.
Begin mixing until you achieve desired consistency.
Adding more dish soap or body wash will give you a more flexible consistency, while more cornstarch will provide a harder slime.
Optional: Add glitter for a touch of color. Stir until mixed throughout.
Store in an airtight container.
This is great for hours of fun.
How to make slime with cornstarch and glue
This next sticky concoction will make loads of fun for the young members of your family. You will need:
- Cornstarch
- White glue
- Food coloring
- A plastic container
- A spatula
Follow these simple steps to make your slippery slime:
Put glue into container or mixing bowl.This will vary depending on how much slime you want to make. However, you can start with about a 1/4 cup and experiment from there.
Add in food coloring of your choice.If you add too much, simply add more glue to get the desired color mixture.
Mix the glue and food coloring together until you achieve your desired color and a smooth mixture.
Add in the cornstarch.You will use about two times as much cornstarch as you did glue.
If you add less cornstarch, you will get a more liquid consistency. Adding more cornstarch will make for a harder slime.
Mix your concoction.The mixing process can take some time and it may seem as though you have an excessive amount of cornstarch. Not to worry, keep mixing to achieve a smooth slime.
Seal in an airtight container or plastic bag.
Now, get to smacking, slamming, thumping, grabbing, turning, mixing, or whatever comes to mind.
When the time comes to rid your household of any of your awesome DIY slime, dispose in the trash can. Putting down a drain can cause blockages or clogs.
Check out this article for more safe slime recipes.