If your sewing machine leaves gaps in a seam on stretch fabric, use a test strip to find out whether the cause is the needle, threading, stitch choice, or the way the knit is being fed. This controlled method is useful for home sewists working with jersey, rib knit, athletic fabric, or swimwear. You will finish with a repeatable setup to carry to the garment, instead of changing several settings at once.
Prerequisites
- Tools and materials: scraps of the same stretch fabric (ideally cut from the project offcut), the thread intended for the seam, a sewing machine and its manual, fresh needles suited to knit fabric, fabric marker or sticky labels, and a notebook.
- Estimated time: about 15–30 minutes, depending on how many comparisons are needed.
- Difficulty: Easy.
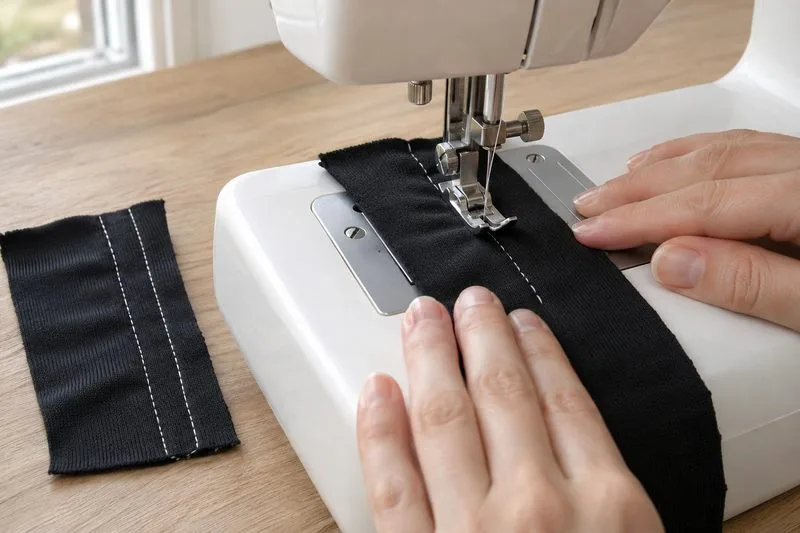
Keep the test strip at least 2 inches wide and 8–10 inches long. For a seam that uses multiple layers, make a second sample with the same layers. Do not test on a folded project edge that differs from the actual seam.
Step-by-step test
Step 1: Make a baseline sample
Cut a strip in the same direction and from the same fabric as the problem area. Mark the fabric’s lengthwise direction, then label one end “A.” With the machine off, note the current needle type and size, thread, stitch, and any stabilizer. Turn the machine back on and sew a short baseline seam using the settings that produced skipped stitches. Guide the fabric without stretching or pushing it. Mark the start of the seam and count or photograph any gaps.
Step 2: Check and replace the needle
Turn off the machine before changing the needle. Confirm it is fully inserted in the correct orientation for your machine, then fit a new needle recommended for knits. A stretch needle is designed for elastic or highly elastic knitted fabric; a jersey or ballpoint needle may suit less elastic knits. Choose the size based on the fabric weight and thread, following the machine and needle maker’s guidance. SCHMETZ explains that its stretch needle’s special eye/scarf geometry helps avoid skipped stitches, while Janome’s MC5700 manual lists an incorrectly inserted, bent, blunt, or unsuitable needle among possible causes. Use the needle system specified by your machine manual.
Label the next section “B,” and sew the same seam with only the needle changed. If gaps disappear, the needle choice or condition was likely a key factor. Keep this as a working result, not proof that every other setting is correct.
Step 3: Rethread and compare
If skips remain, label a fresh section “C.” Raise the presser foot, remove the upper thread, and rethread the machine according to its manual so the thread can seat in the tension path. Check that the bobbin is correctly installed and the thread is not snagged. Sew the same seam again without changing needle, stitch, or fabric handling. Compare C with B. This isolates a threading-related improvement.
Step 4: Test stitch and fabric handling
On section “D,” change one thing: use a stretch-compatible stitch recommended in the machine manual, such as a narrow zigzag or a stretch stitch, if appropriate for the garment. Do not assume a straight stitch will stretch with a highly elastic seam. Sew at a steady, moderate speed, letting the feed dogs move the fabric; do not pull it from behind the presser foot. For each trial, keep the fabric layers and seam direction consistent.
When gaps are sporadic or show up only at thicker joins, make a second sample with the actual layers stacked at the seam. This checks whether the extra thickness deflects the needle. If the seam requires support, add the same lightweight stabilizer to the test that you intend to use on the garment, then compare a new labeled section. Only adjust presser-foot pressure if your machine provides an adjustment and its manual supports doing so.
Step 5: Stretch and inspect the winning sample
Choose the section with even stitches and no visible holes or damaged knit loops. Gently stretch it across the seam in the direction the finished garment will stretch. The seam should extend without popping, and the fabric should recover without a ladder of enlarged holes. Record the successful needle, stitch, thread, layers, and any stabilizer. Repeat the same setup on a new strip before sewing the garment if your final seam includes different layers or a curve.
Troubleshooting
- Every sample still skips: Stop and turn off the machine. Rethread both upper thread and bobbin, verify that the needle is fully seated and the correct system for the machine, and try another new knit needle in a suitable size. If skips persist on a simple sample, consult the machine manual or service provider; hook timing may need professional attention.
- Skips occur only on thick intersections: Reproduce the intersection on the test strip. Check for a bent needle and avoid pulling the fabric. If your manual permits it, use a suitable needle and stitch for the added layers; a hump-jumper or leveling aid may help the foot approach an abrupt height change, but test it first.
- Stitches appear on the scrap but pop when stretched: The skipped-stitch issue may be solved, but the seam itself lacks enough give. Compare a stretch stitch or narrow zigzag and inspect the seam after gently stretching. Use settings appropriate to your machine and fabric rather than tightening the seam by pulling the cloth.
FAQ
Which needle should I use for stretch fabric?
Start with the type specified in your machine manual. Stretch needles are intended for elastic or highly elastic knits; jersey needles suit knitted fabric, while a ballpoint tip displaces knit loops. Needle size also needs to suit fabric thickness and thread. Test on a scrap because knits vary.
How long should a sewing test strip be?
An 8–10-inch strip gives room for a baseline and several labeled comparisons. Cut a wider or longer piece when you need to test multiple fabric layers, a curve, or a longer stitch pattern.
Should I change tension when stitches skip?
Not as the first experiment. First check the needle and threading, then change one setting at a time. Tension can affect seam appearance and balance, but skipped stitches can have other causes. Follow your machine manual and keep a labeled test sample for every adjustment.